
9 Secret Apple Watch Features on watchOS 10 Most People Don’t Know About
With every watchOS update, there’s a myriad of under-the-radar features that could easily be overlooked if you’re not paying close attention.
Here, we’ve curated 9 lesser-known features on watchOS 10 that can make your Apple Watch experience even more enjoyable.
Keep in mind only Apple Watch Series 4 or later are compatible with watchOS 10.
1. Night Mode Automation

For Apple Watch Ultra 1 and Ultra 2, watchOS 10 introduces an upgrade to its existing Night Mode. The new Modular Ultra watch face, alongside the Wayfinder face, now supports an enhanced Night Mode.
This feature allows for a red filter overlay on the watch display. In previous versions, you could manually activate Night Mode by turning the Digital Crown. But in watchOS 10, a Night Mode setting has been added to the watch face edit screen.
Users can now opt between Auto, On, or Off. The Auto setting is designed to detect poor lighting scenarios and activate Night Mode. And I have to say, it works very well.
Important! The Digital Crown no longer activates the Night Mode due to its new function of bringing up the Widget Stack.
2. Control Center Icons
With watchOS 10, Apple introduces a set of status icons at the top of the Control Center. These icons provide real-time information about crucial settings.
Whether your Apple Watch is connected to cellular, an app is currently using your location, or you’ve toggled on features like Airplane Mode and Do Not Disturb, these icons offer a quick glance at your watch’s status.
To access the feature, all you have to do is tap on it.
3. App Switcher
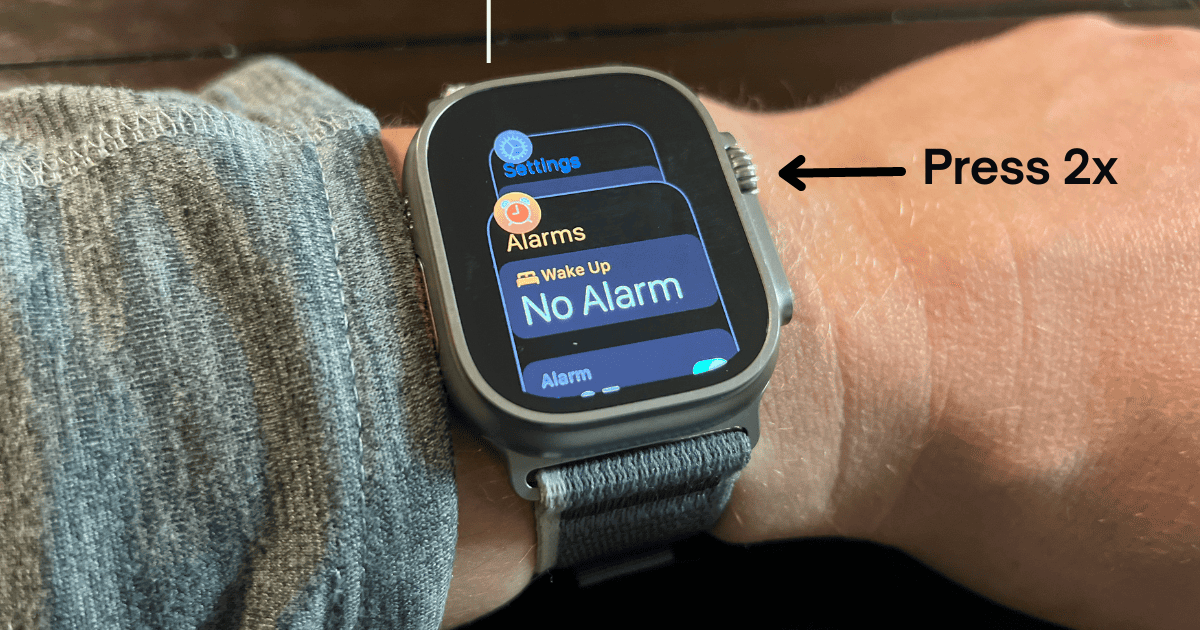
With each iteration, watchOS evolves, altering how we interact with our Apple Watches. In watchOS 10, there’s a subtle but significant shift.
While pressing the Side button once used to bring up the Dock (rebranded to the App Switcher), it now pulls up the Control Center.
To access the App Switcher:
- Double pressing on the Digital Crown will take you right in.
- Once inside, use the Digital Crown to skim through apps. The most recent app you’ve interacted with will be front and center. Following that, apps are listed based on when you last opened them.
- Active sessions from apps, like a navigational route in Maps or an ongoing Workout session, earn a special spot right at the forefront.
4. Dynamic Flashlight Controls
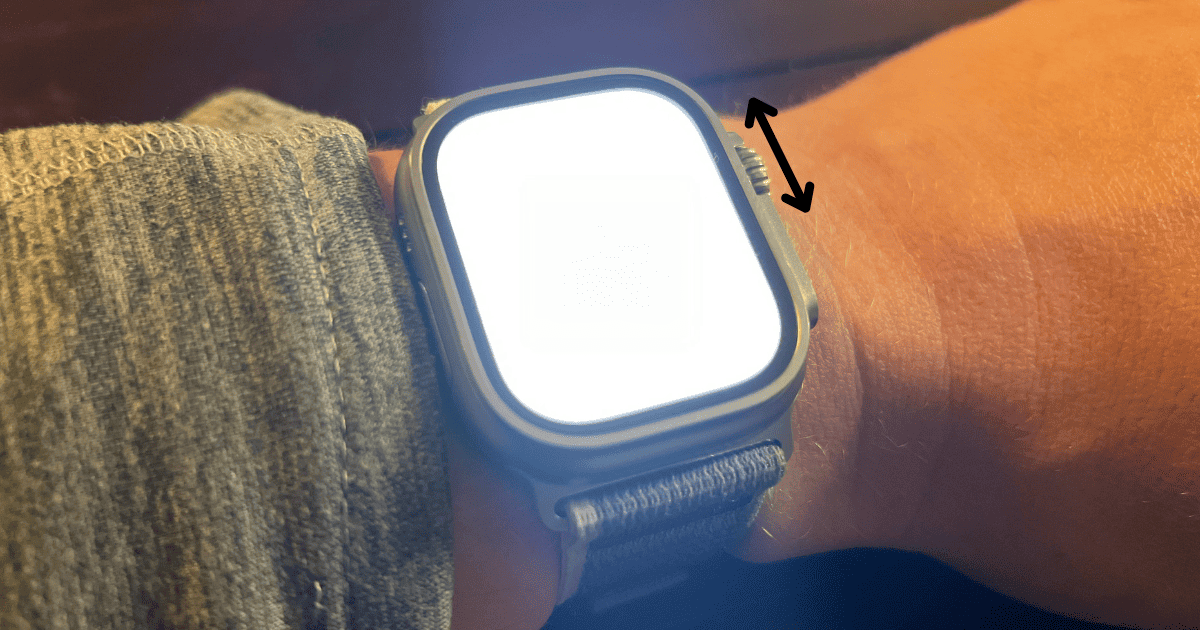
With watchOS 10, controlling the flashlight’s intensity has become significantly easier.
To activate the flashlight, press the Side button to bring up the Control Center and then hit the Flashlight icon. Once it’s on, adjust the brightness by simply turning the Digital Crown up or down.
Tip! Swipe left while in flashlight mode to switch between steady white light, flashing white light, or a steady red light.
5. Elevation Alerts

Navigating heights? watchOS 10 has got you covered. Within the Compass app, there’s a new feature that lets you set your desired elevation limit.
Once set, your Apple Watch will gently remind you when you’ve surpassed that altitude, helping you stay safe and conscious about taking necessary breaks.
To activate this:
- Head over to the Compass app on your watch.
- Tap on the info (i) symbol.
- Select ‘Set Target Alert’.
- Use the Digital Crown to input your elevation preference.
- Hit the checkmark.
6. Find Your iPhone (with directions)

Credit: Macrumors
Exclusive to the Apple Watch Series 9 and Apple Watch Ultra 2, locating your misplaced iPhone 15 has become much easier, thanks to the new Ultra Wide-band S9 chip they share.
This enhanced technology means you can not only ping your iPhone but also get specific directions to its location, including haptic feedback when you get close.
Here’s how to use it:
- On your Apple Watch, press the Side button to access the Control Center.
- Tap on the ‘Ping iPhone’ icon.
- Listen out for the sound your iPhone emits.
- If your Apple Watch Series 9 or Ultra 2 is within the iPhone’s vicinity, you’ll see on your watch screen a directional hint and the approximate distance to your iPhone. As you move closer, the displayed circle enlarges, steering you right to your device.
7. Capture Video

WatchOS 10 takes Apple Watch’s versatility up a notch. Now, using the Camera Remote app, you can initiate video recording on your iPhone straight from your wrist.
- Launch the Camera Remote app on your Apple Watch.
- Set up your iPhone in the desired position. Use your Apple Watch as a live viewfinder to ensure the perfect shot.
- Zoom in or out with a turn of the Digital Crown.
- When ready, press and hold the Shutter button on your watch to begin recording.
- Let go of the button to end the recording.
8. Type to Speak
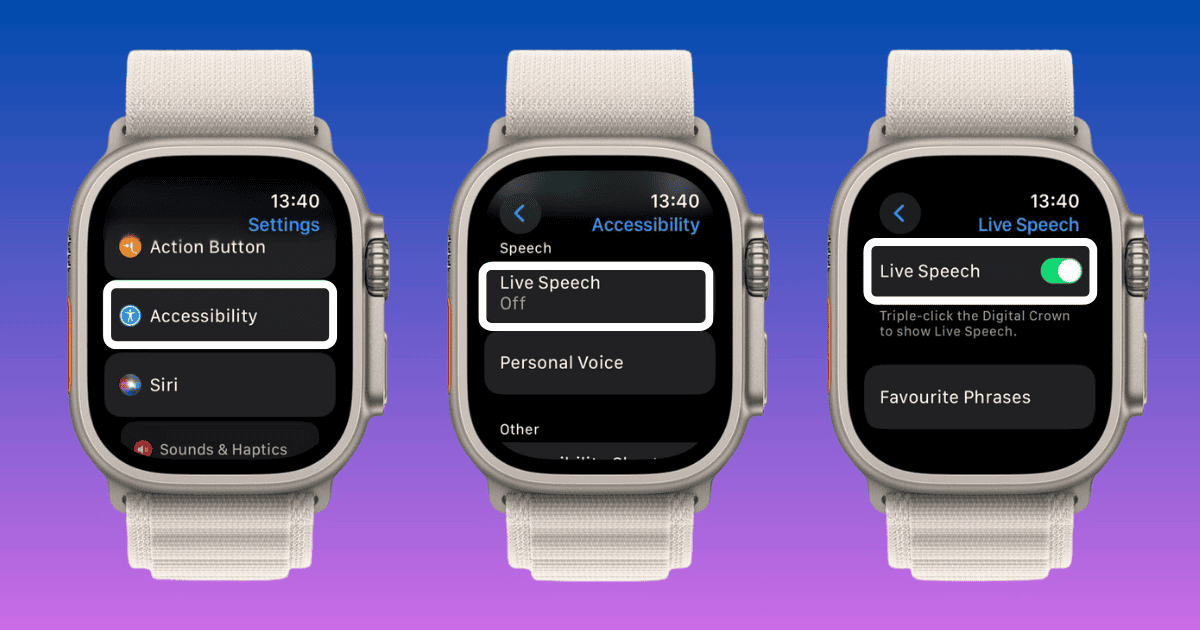
Ever wanted to convey something without uttering a word? WatchOS 10 makes it possible with the Live Speech accessibility feature.
This innovative addition allows you to type on your Apple Watch, and have those words narrated aloud – whether you’re face-to-face or on a phone and FaceTime audio call.
- Configure the Accessibility Shortcut by heading to Settings -> Accessibility -> Accessibility Shortcut -> Live Speech.
- To activate, simply triple-click the Digital Crown.
- Then type away and let your Apple Watch do the talking!
9. View Maps Offline

Navigating unfamiliar territories becomes hassle-free with iOS 17’s newly introduced feature – offline Maps. Even when you’re out of a cellular or Wi-Fi zone, you can still access turn-by-turn directions and area-specific information.
Whenever your iPhone is on and within the cozy embrace of its Bluetooth range (approximately 33 feet or 10 meters), the offline maps seamlessly appear on your Apple Watch.
You must download maps on your iPhone first, then they will automatically mirror to your watch.
Here’s how to do it:
- Fire up the Apple Maps on your iOS 17 device.
- Type in the desired area’s name into the Maps’ search bar.
- Spot the ‘Download’ button on the information card of the searched area and give it a tap.
- Frame your area of interest for the map download. You can stretch or squeeze the frame’s sides and corners to fit your preference. An interesting tidbit – the app gives you a heads-up on the storage space needed for your chosen map section.
- Once satisfied, tap ‘Download’.
Related Articles:

How to Install Apps on Apple Watch (Updated for watchOS 10)
Are you looking to explore new functionalities or bring back previously deleted apps? This article provides a step-by-step walk-through for how to install apps on Apple Watch that are running watchOS 10 or newer, as well as how to troubleshoot some common...

Apple Watch Ultra Comparison: Analyzing Step Consistency, Calories, Battery Health, and Performance Metrics
I wore the Apple Watch Ultra 1 and Ultra 2 from a full charge until they both died. Throughout this Apple Watch Ultra comparison, I gathered an analyzed various data-points such as step count, calories burned, and battery life. This hands-on information is could be...

I Put the Apple Watch Ultra 2 Battery to the Test in Multiple Scenarios. Here’s what I found
Key Ultra 2 Battery Insights: Max Battery Life Potential: By turning off 'Always On Display', 'Raise to Wake', and forgoing sleep usage, you can achieve a 20% longer battery life, reaching up to 84 hours. Features Impact: Using the watch for sleep, having the 'Always...

by Ken Lynch
Ken is a Technologist, Healthcare Data Analyst, and the owner and sole contributor to The Wearable Guy.